For more than 25 years, I have collected vintage cotton gloves at flea markets, junk stores, antique shops, garage sales, etc.
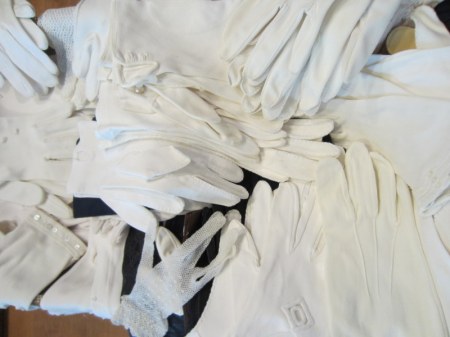
White Glove Collection
Often I purchase just a single glove. It’s match was lost somewhere along the way. That’s not a problem because often I need only one glove to add to a quilt, a collage on a pillow, or now as a hanging pocket for a Mother’s Day gift.
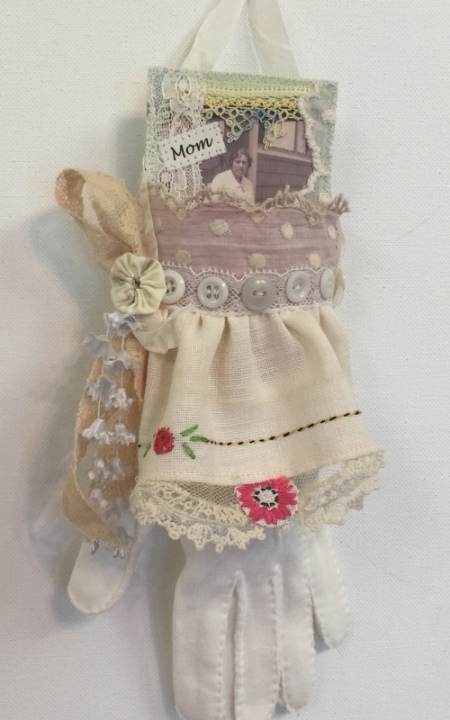
Embellished Glove
In my collection of gloves, I have some that belonged to my mother and to me. Yes, Mother definitely wore gloves to church along with a hat. As a little girl and a young teen, I also wore gloves for church attire and for high school and college formals.
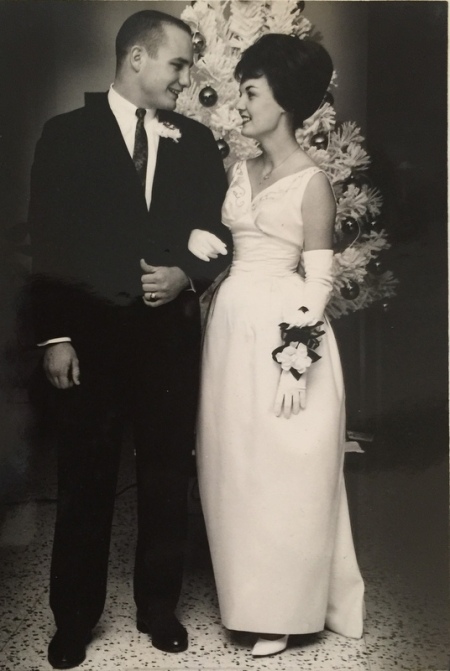
Chi Omega Christmas Formal
Sigh…and I married that young man. I think I can smell those gardenias on my wrist corsage. That was only a few years ago.
But today I want to tell you how to make one of these sweet little embellished gloves for a Mother’s Day gift or as a wedding tribute.
Supplies Needed
White cotton formal glove no longer than 9″.
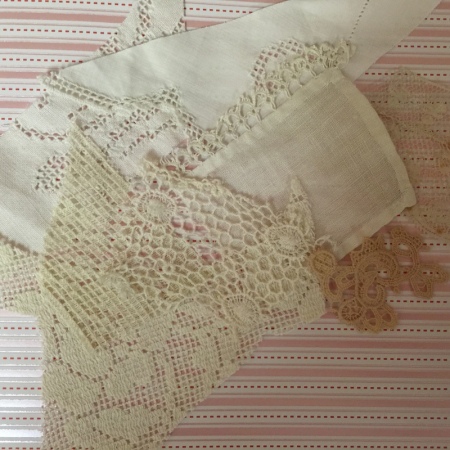
For embellishments, you will need vintage laces, embroidery pieces, ribbons, white buttons, pearl beads, white fabric scraps, large beads, vintage bridal illusion, lace motifs, tiny flowers, hankie or napkin corner piece.
Polyester stuffing in very small amount.
For collage card you will need sturdy scrapbook paper, vintage photo, appropriate quotes and sayings, lace tidbits.
Let’s Start
I can make one of these embellished gloves in an evening in front of the TV watching a movie or documentary with my husband. I work with all of these items held on a tray on my lap as I sit in my chaise lounge. Often I have a sleeping kitty lying on a quilt next to my legs.
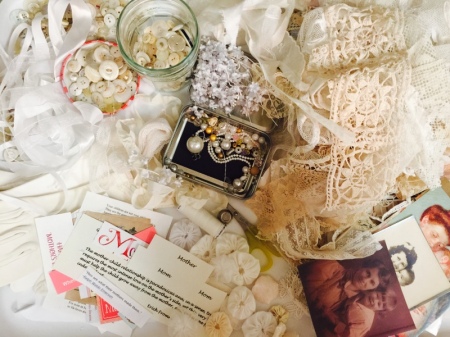
Everything I Need
- Get all of your supplies together.
- Select a glove. I choose one that’s about 8-9″ long. They seem to work best. Each glove is different from the last. Look at the glove you have and create some sort of plan of how you will proceed. I find it’s easiest to create if the glove does not have details on the front that you do not want to cover up. I’m going to demonstrate for you on one such glove.
- Gather-up lace or an embroidered piece or existing ruffle to stitch to the top of the glove. I stitch by hand. It’s relaxing stitching and creating. This ruffle does not go to the back. Stitch down sides of ruffle to each side of the glove.
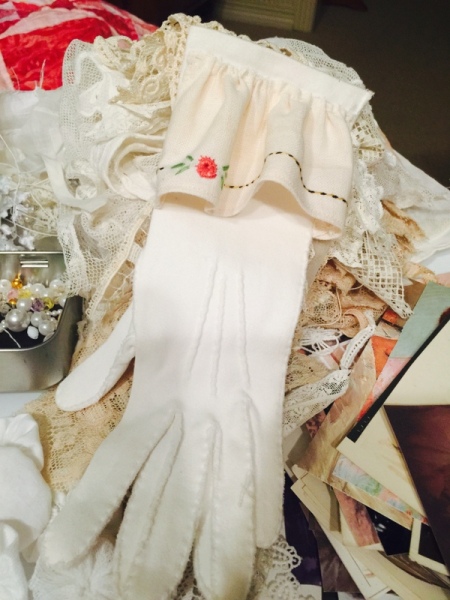
Gathered Skirt at Top of Glove
4. Add an extending piece of lace or trim to the top edge of the glove. This can be stitched inside the glove or on top. This extension goes all around the top of the glove.
Extend Top of Glove with Lace or Trim or Ruffle
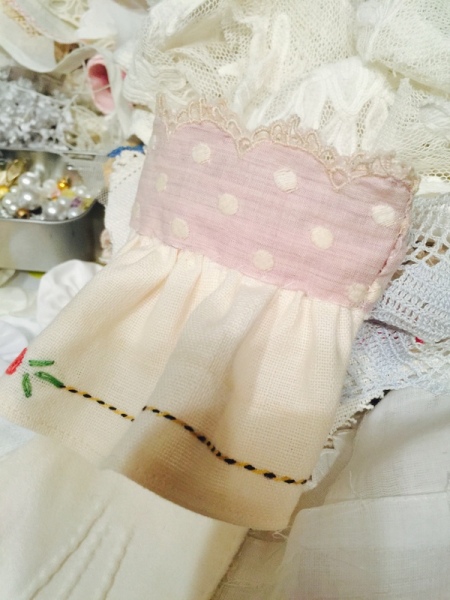
5. Add lace and buttons where the top two pieces come together. This lace goes all around to the back of the glove. The buttons are only on the front.
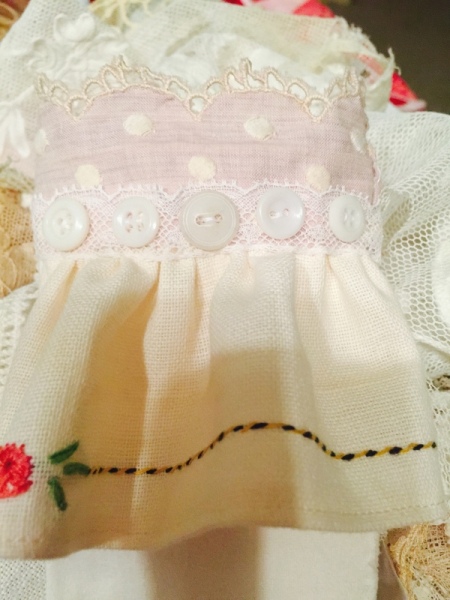
Add Lace and Buttons
6. The little bit of lace added to the bottom of the ruffles was definitely a snippet. I cut a stray embroidered flower off another piece to tack to the lace piece. Stitch it to the bottom of the ruffle.
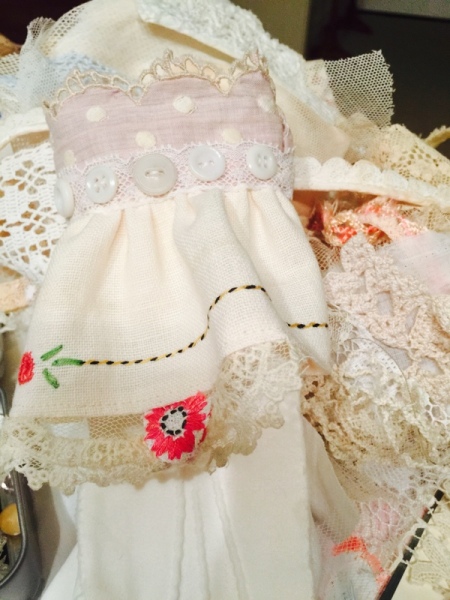
Lace to Bottom of Ruffle
7. Now let’s add a 14″ piece of ribbon for hanging the glove. I used old hem tape I spritzed with spray starch and “squenched” together and left to dry. Leave about an inch of ribbon below where you tack it to one side of the glove. Bring remainder of ribbon to other side and tack it. Leave an inch of ribbon below where tacked. Add a loop of lace, a small yo-yo, tiny flowers, button or whatever you have to embellish where you tacked the ribbon to the glove.
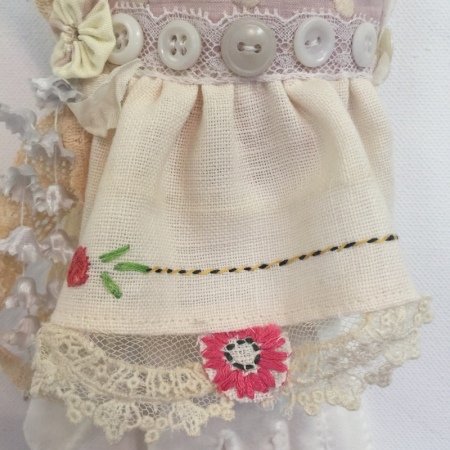
Embellish Tacked Ribbon Hanging
8. Let’s make a little card to insert in the glove. This I do on the sewing machine. Choose a paper that can easily be written on for a message. Cut 2 pieces of heavy cardstock or heavy scrapbook paper 2 1/2″ X 6″.
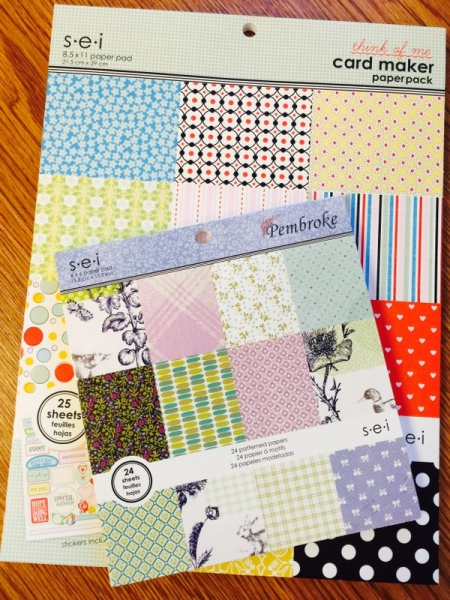
Scrapbook Paper
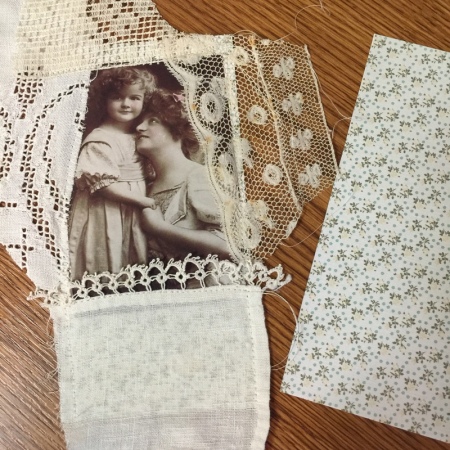
9. Choose a photo, a few snippets of lace, the word Mom or Mother, and an appropriate saying or quote.
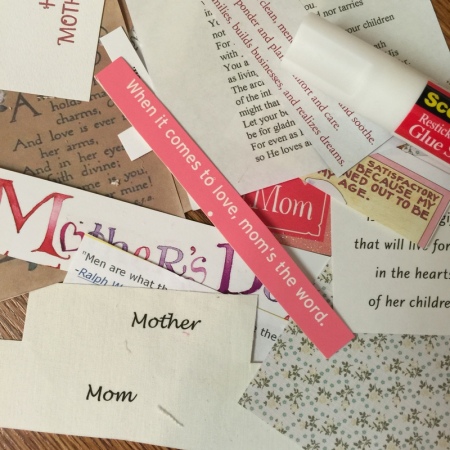
Words
Lace Snippets
10. Using a glue stick, place photo and lace in place on scrapbook paper. Stitch on machine. Second piece of paper is for the back of the card. It will be glued to the back to cover the stitches.
Create and Stitch on Scrapbook Paper
11. Trim lace even with paper. Add sentiments with glue stick. Stitch through paper. Glue second piece of scrapbook paper to back of card. Zig-zag stitch outside edges to hold together. The back of card is a place to add your own personal sentiments.
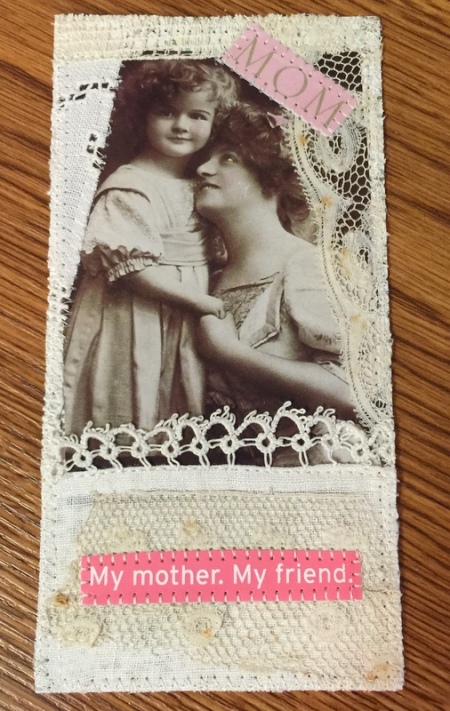
Add Words of Endearment
12.Now it’s time to add a little polyester stuffing at the top of the gloves fingers. Do not stuff into the fingers. This is only a tiny amount on which to put your card. Insert completed card. Add this same amount of stuffing to the lower front of card and lower back of card. This will keep it in place. There is also room in the glove to add a small gift.
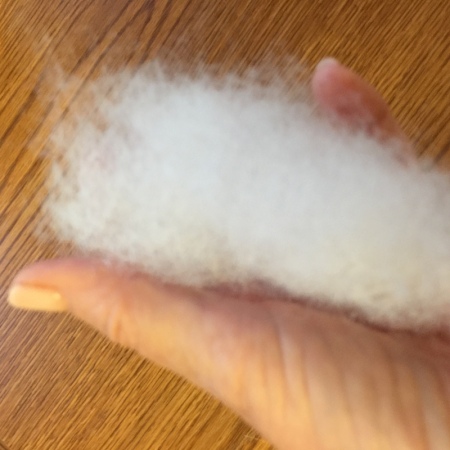
Polyester Stuffing
Now your one of a kind Mother’s Day greeting is complete. Aren’t you proud? Hang it by the ribbon and admire it for a while before you give it away.
 Mother’s Day Glove


Here are a few more samples for you.


")

If you want a closer look, go to my etsy shop for more details. They are so much fun to make. Send me pictures of what you create. I would love to see what you make.
Until next time…Love and stitches, Judy
Tags: Collage Greeting Card, create, embellishments, Glove pocket, Mother's Day, Play Date, sewing, Vintage hand glove, vintage lace, Vintage photo

March 18, 2016 at 12:23 PM |
Absolutely delightful!
LikeLike
March 19, 2016 at 8:30 PM |
Thank you so much. They are fun to make.
LikeLike
April 4, 2016 at 9:31 PM |
I’m a little behind in responding. You are way too clever! And your college dance pic was movie star worthy. Your waistline was too be envied. I look forward to reading more. Sending love & hugs!
LikeLike
April 10, 2016 at 5:06 PM |
Hello, Mary Jane. Love hearing from you. I’m sure that small waist was due partly to the merry-widows we used to wear. Remember?
LikeLike